I have a ThinkPad T43p. It's a fine laptop! It has a decent FireGL V3200 GPU on the PCI-E x16 bus, 128MB VRAM, the laptop takes DDR2, and best of all it has the classic thinkpad form factor and no annoying windows key!
Full specs:
1.83GHz Pentium M
2GB DDR2 RAM
FireGL V3200 w/ 128MB on PCI-E x16 bus
1400x1050 LCD (excellent!)
Top-tier keyboard
Nice 14.1" 4:3 form factor you don't find any more
(Edit: Since the time of writing, I've realised that this GPU no longer has proprietary GPU support under Linux, so it's a lot less useful... still, it's a nice machine and an interesting hack.)
The laptop has one achilles heel, however. The other T4x series, such as the T40, T41, T42, and p variants of each all use a chipset that natively supports IDE or PATA drives. When the T43 and T43p came out, their new 915GM chipset didn't support more than one PATA port, and that was reserved for the ultrabay slot.
IBM's solution? A Marvell 88SA8040 PATA-to-SATA bridge chip would convert PATA signals from a standard IDE hard drive into SATA signals for the chipset to use. At the time, that made sense - SATA wasn't as popular, drives were more costly, and most importantly the rest of the T4x line used PATA drives.
That was a good thing back then, but it's irritating now! PATA drives of decent capacity are harder to find, and worst of all the T43/T43p bios brings up an annoying and loud beeping error should you install a non-stock HDD. After a few days of 160GB 5400RPM IDE hard-drive sadness, I decided I wanted SATA.
I took it apart. I found the marvell chip and realised that the chip in question was tiny. TINY. Less than half the width of my smallest finger. It's a tiny QFOP package with 16 pins on each side, and I didn't even know the digital aspect of it yet!
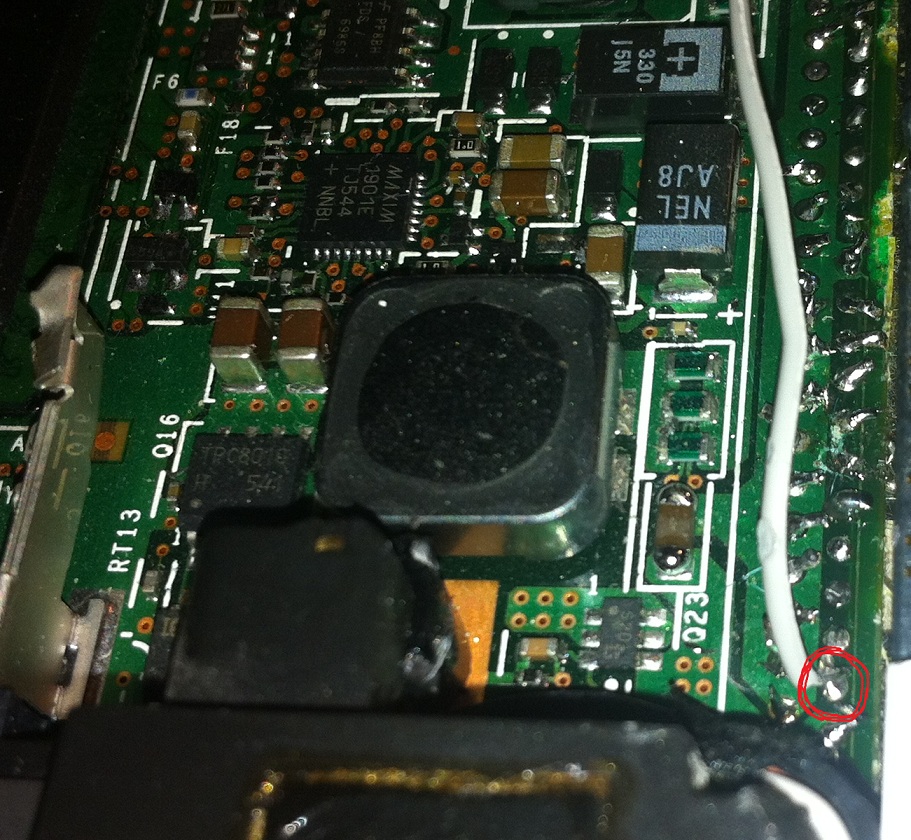
I figured I should learn about that first. Using extreme research skills I found that many users in germany, china and korea had already done this. Shocking was the complete lack of public documentation, though! Using some simple proxy nonsense I registered on a german forum and found this useful picture, from an X41, which suffers the same fate and thus has the same 88SA8040 chip:
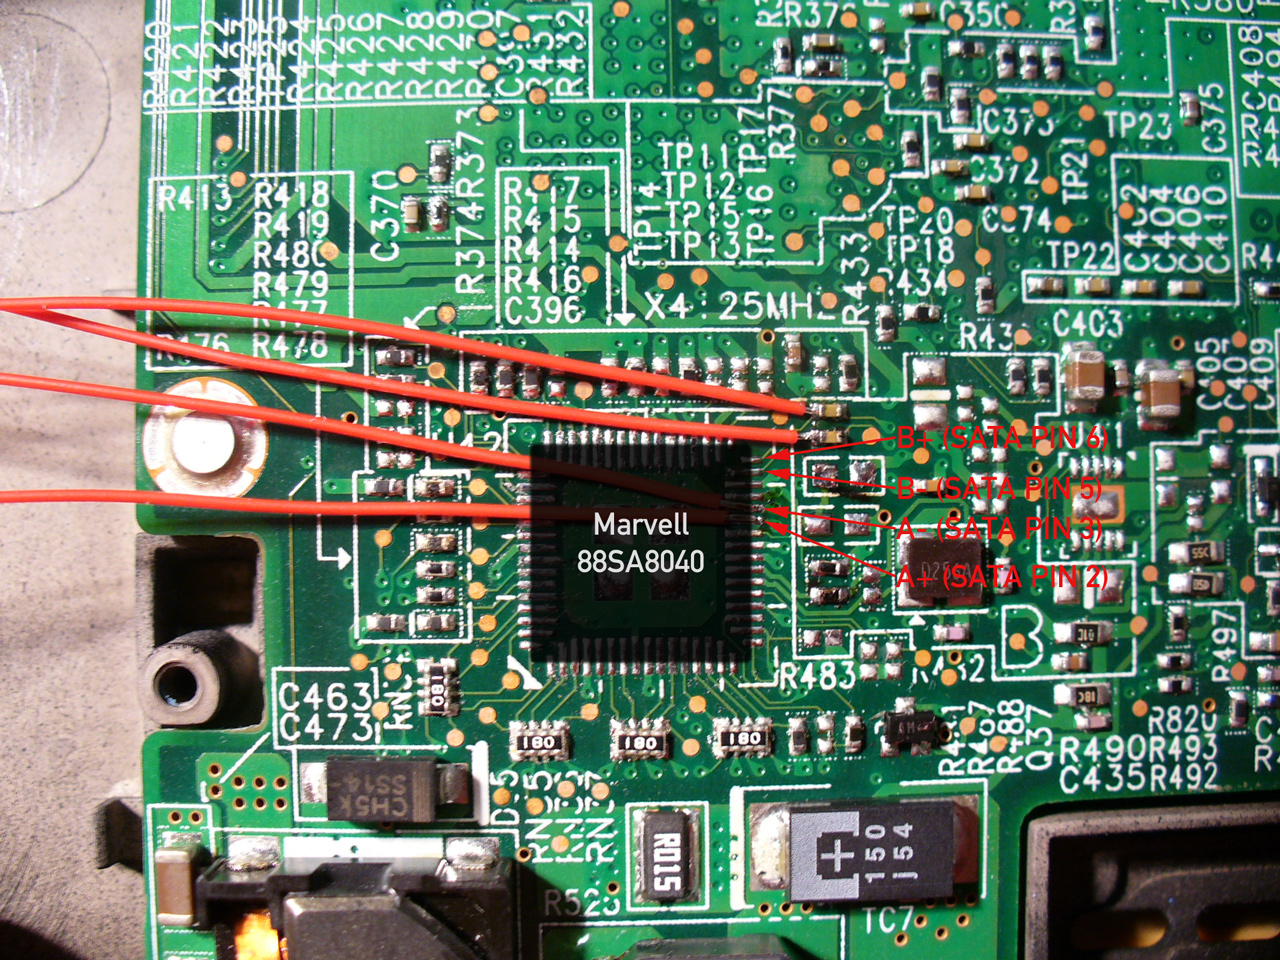
The datasheet for the 88SA8040 was quite elusive, so this image was very helpful in determining which pins to use. Next was to locate the equivelant on my T43p.
Now, if you have the tools, the best solution is to desolder the chip with a heat gun or reflow station, but in my situation I didn't have those tools at 2:30 in the morning. I went old-school with it, and opted to simply cut the traces going to the SATA lines from the 88SA8040. This would in effect disable the chip, allowing me to put in my own SATA data lines in-line to where the old ones went without having to desolder the chip.
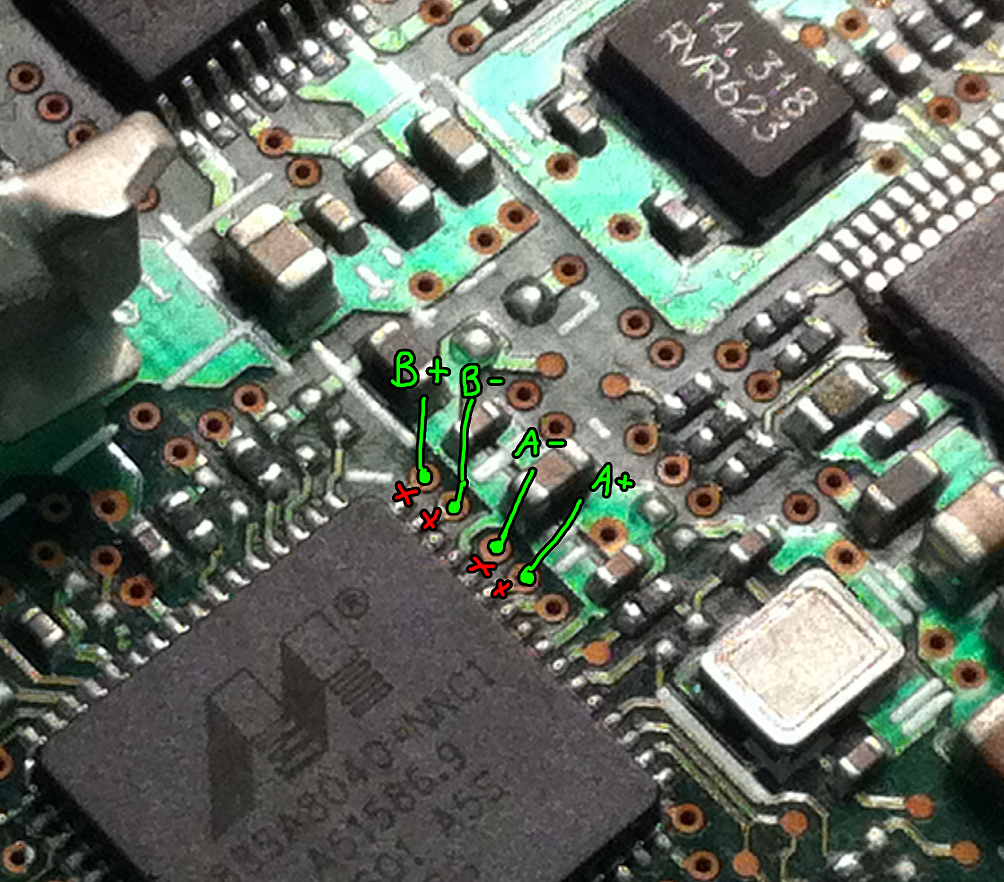
Here is a diagram showing where I cut and where I soldered the four data lines:
The first time around, I did a quick, dirty job, just to see if I could get it to work at all. I hadn't worked out power yet, so I simply powered the HDD with a cable from my desktop (The HDD is a WD3200BEKT, an excellent 7200RPM 320GB SATA HDD; it's fast and quiet. Get one. Or five.)

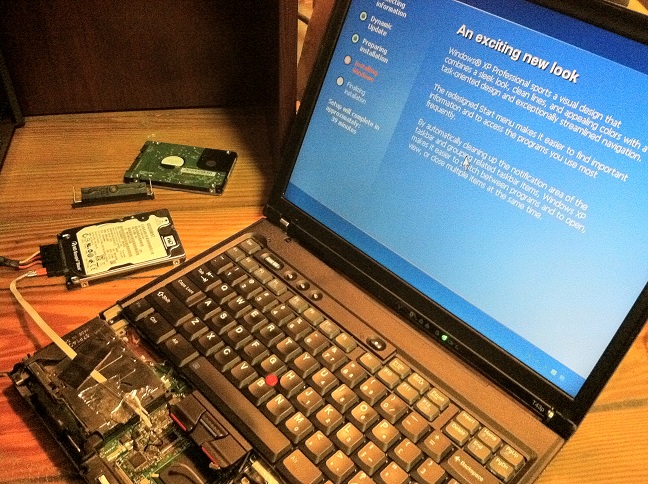
Let's power it up! First run... it never works... I'm sure I'll have to re-do it...
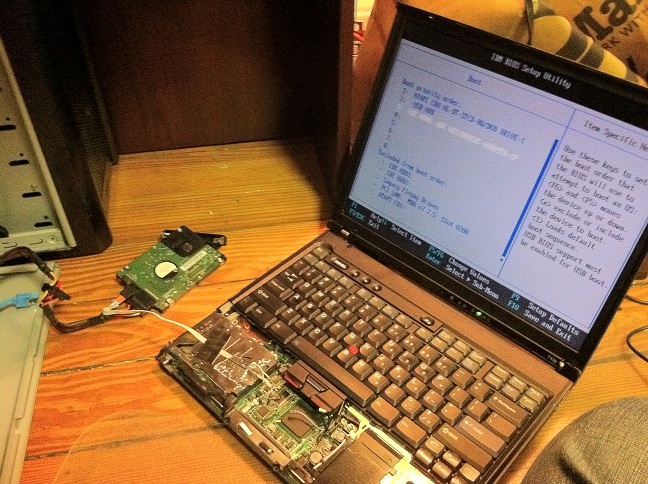
BAM! WHAT IS THAT? THE HARD DRIVE? IN MY BIOS? It's more likely than I had thought! I couldn't believe it! Just to be sure it was really working I popped in an XP disc and installed quickly.
It's working! The last step is to clean it up and re-do it in a much neater (and more reliable) fashion.
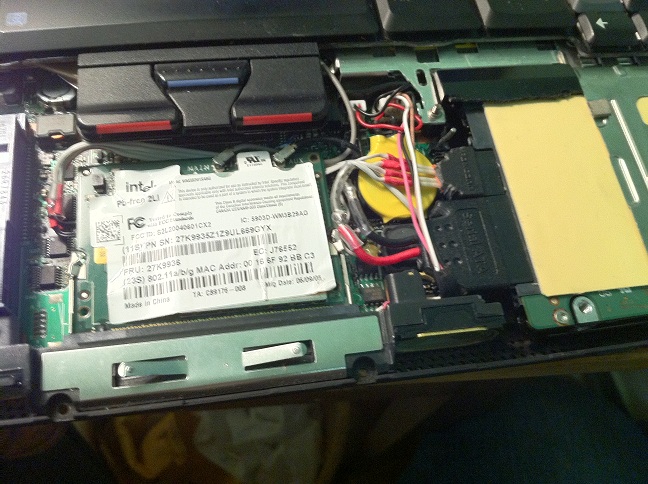
To power the drive, I pulled from the old IDE connector. First, in order to actually *fit* the drive *inside the laptop* I'd need to remove the old connector. I gently removed it using wire cutters and brute force. With it out of the way, I found the capacitor connected to the 5V line intended for the HDD and a nearby ground. Using a slightly cut-up SATA power connector, I soldered the two wires where they should go (IDE pin 42 to the Red Wire, Ground to the Black Wire). This picture is a bit awful, but should let you see it:
Then, I re-soldered the SATA data lines, this time covering them in gratuitous amounts of heat shrink tubing for stability. I decided to use a modified SATA plug from a desktop cable. With some modification to the old plastic IDE chassis I was able to fit it in.
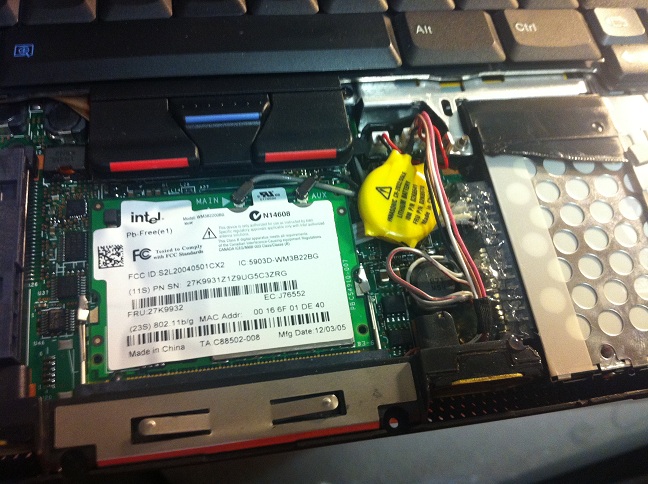
Here's a shot of the final inside:
Since then, I've done this a few times, most recently on a T43 of mine. Now I've gotten used to just mounting normal SATA plugs inside the laptop, allowing the original HDD caddy to be used and drives can just slide in normally:
I hope this is helpful to anyone who wants to do the same thing! This should apply to the R52 as well, from what I remember. Good luck!
Back to main index