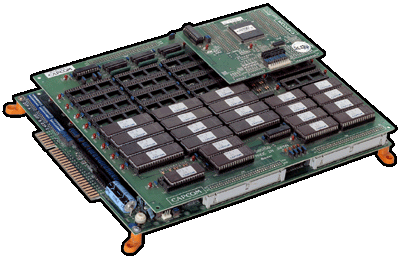
I have a bunch of arcade circuit boards. These contain everything needed electrically to run the game, and use a single edge connector to provide power, a speaker connector, video output, and button connections. In the mid-1990s, this connector was standardized and given the name JAMMA after the organization that introduced it. Here is a Capcom CPS1 JAMMA-standard arcade PCB:
In order to play these, you typically want an arcade cabinet. I don't have space for that all the time, and switching them out isn't convenient. For this, a common solution exists curiously dubbed a "SuperGun". It is a device that provides what an arcade cabinet does, but with an adaption to a home environment. This means it has portable controllers or arcade control attachments, and a means of interfacing to a typical monitor or television.
I opted to make something like this. I opted to make a few simplifications to make the project simpler, cheaper, and smaller. For one, all monitors / televisions I have take 15khz RGB, which is what all these arcade boards put out natively, so no conversion will be needed on my end. In addition, I'd like to not need to get or make yet another set of controllers, so I chose to use Super Famicom pads. They provide plenty of buttons, are of reasonable quality, and have a good layout for Neo Geo software. For this project I used a Teensy++ 2.0 microcontroller to be the interface between the Super Famicom controller protocol and the JAMMA arcade standard. Finally, almost every JAMMA compatible game released does not really require the -5V line, so I do not plan on including it in my project.
The biggest amount of work here was getting the Super Famicom pads to interface with the arcade PCBs. JAMMA boards pretty much all detect inputs by pulling a line HIGH with a pull-up resistor, expecting a normally-open button to pull it closed to ground, making it LOW. Buttons are active LOW as a result.
What this means for the implementation is that when a button on the Super Famicom pad is not being pressed, the microcontroller needs to have no influence on the JAMMA input, or be floating. This is achieved by setting the MCU's IO pin to an input, putting it in a HIGH-Z state that has virtually no influence on the line. When a Super Famicom button is pressed, the pin is switched to an output and set LOW. Simple.
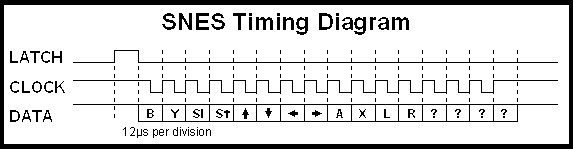
To read the Super Famicom pad, the LATCH/STROBE line goes high for one CLOCK pulse, and the first button is read. Each CLOCK pulse makes the DATA line return the state of the next button. I won't go into a lot of detail here; this information is easily found and better explained elsewhere. Here is a timing diagram of what's going on:
I found I could grab the SFC pad data pretty fast, even with the MCU set to the lowest clock speed available, 1MHZ. Using an oscilliscope I verified that I am grabbing the pad state and setting it on my output pins in far under 10 milliseconds, which is slower than 16.6ms, or one frame of video data. Games typically poll for inputs prior to the display of the next frame, so being under that time is important. To be lagless, inputs should be captured far under 16.6ms apart from the next polling. My system is extremely low latency and suffers no such "lag" issues.
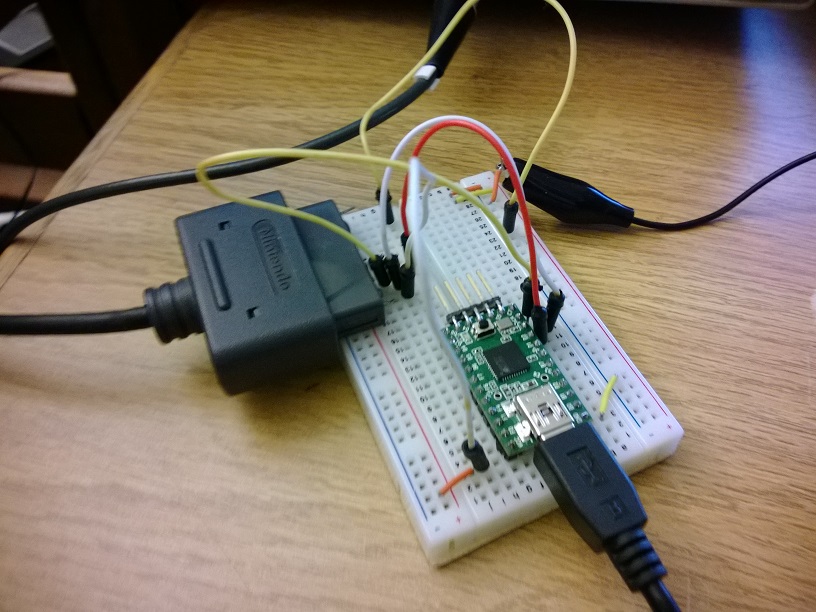
This is the first prototypical version I got working using a regular Teensy 2.0 and a clone pad, lazily soldered up to a JAMMA edge:
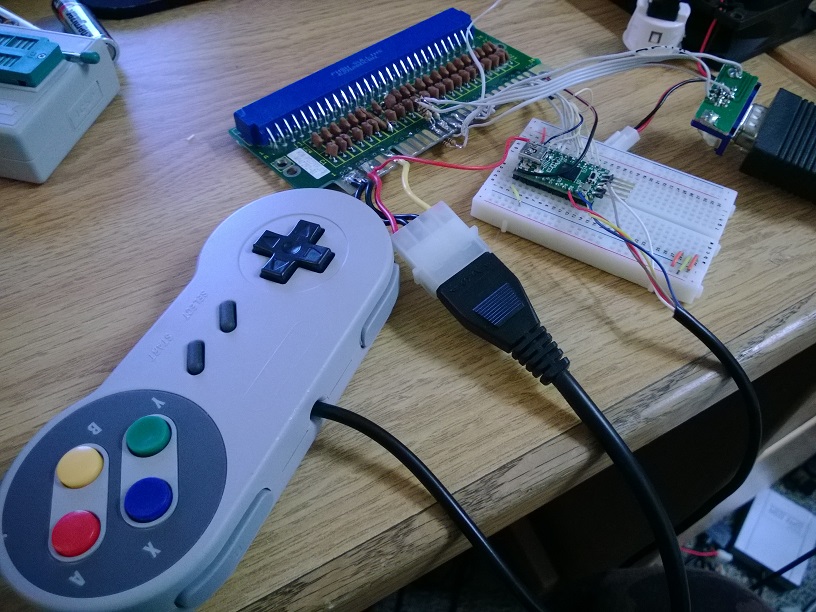
I got a pair of female SNES controller ports from a cheap USB adapter. It was easy to disable the USB encoder on it. Here I am part way through wiring everything up, first with some ugly test wiring just to be sure I have everything running on the previously untested Teensy++ 2.0:
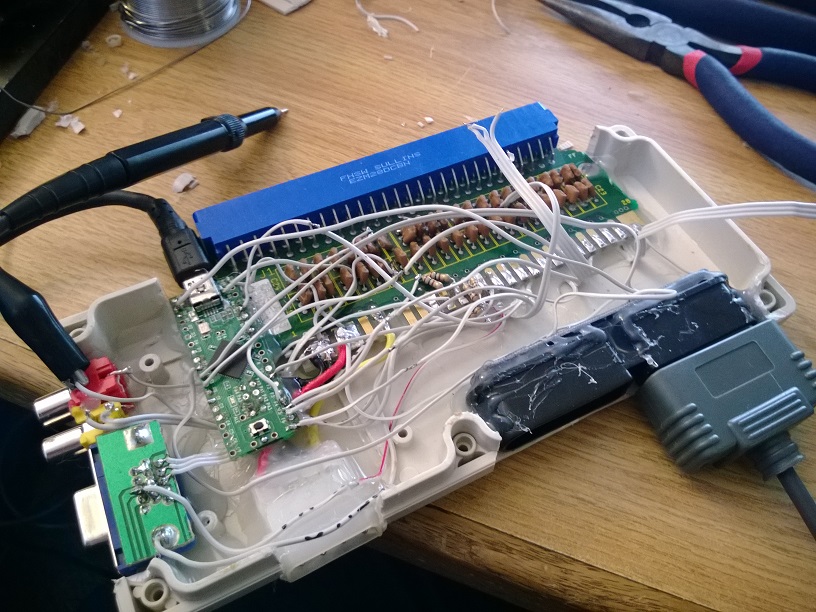
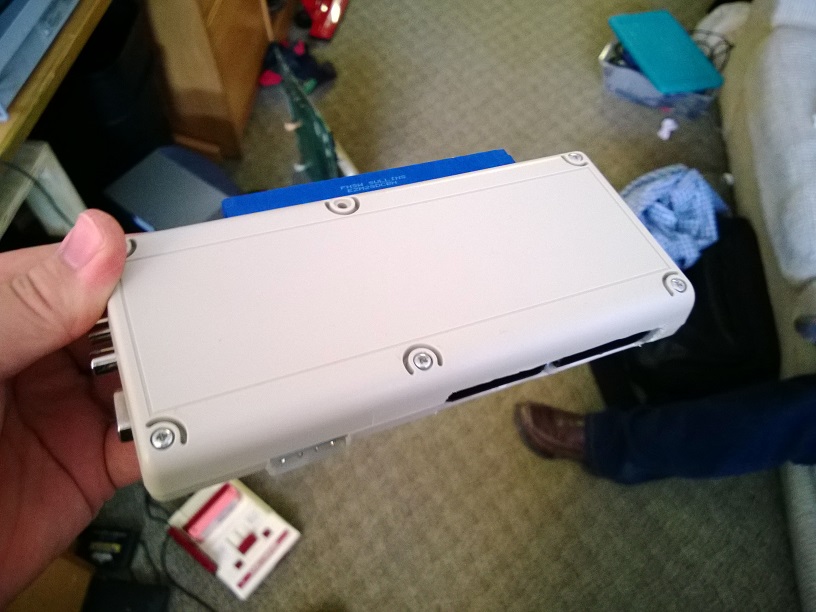
Finally, I got it all packed up in a neat little project box. It has a 4-pin molex connector for power, two SFC ports for inputs, amplified and unamplified mono audio out, JAMMA on the back, and a DE-15 connector for RGB output. I use VGA cables for RGB since they are commonly available and amply shielded. The box, with its little external PSU and two controllers, can be easily put into a bag alongside an arcade stick, or with an arcade PCB.
The Arduino IDE-compatible source code is available for free on my Github page. It can easily be adapted to make a SNES pad adapter for Commodore 64, Atari home computers and VCS systems, Sega Master System, and Mega Drive (with a tiny bit of work). You can look at it here.
Back to main index